Showing posts with label historical costume. Show all posts

Sunday, 28 September 2014

Northern College of Costume - last week!

Apologies for the erratic posting - just been so busy.  The end of the course has now past - 14 weeks of intensive making, 1 week of intensive worrying about the photos and staging the exhibition.


Photo shoot day was Monday - 7.45 am at the college, packed and ready to go- all of 5 minutes away to the York Cemetery chapel- image a convoy of cars with me pedalling away after them....  ( got there and back first!) - a lovely Neo Classical building  - great pillars, odd tapering windows, and in the middle of a very leafy cemetery!


The volunteer men were first, trying to be thug like - Gangs of New York style. Mine has the look but manages not to be brutish- typical, want a grumpy man, find a nice one! Everything looks good in the photos but I will admit to the stirrups being a pain - there was a battle between pulling the trousers up to the waist and the stirrups pulling them back down whenever he sat. The stirrups lost and the fabric got soaked from the long grass, so Lawrence had two tone trousers with flappy ears at the bottom by the end of the morning. He didn't seem to hold it against me. Might not be right, but elastic would be answer- if used in sufficient quantity.

While they were being 'shot' we were preparing for the bustle gown moment - Why does it all take so long? ( really should have had the corset tighter so the bodice sat more smoothly - no mirrors to check it out in)


The photographer had some odd ideas of how we should pose -   we were supposed to be animated - Faye had just started  a most promising joke, but never did get to the punch line.


Pauline Chambers in the centre- spectator sport


   Then the decades dress - mine based on a Jaques Fath 1949 catwalk number ( ummm indeed)
  Had some very odd ideas about posing. 
I'd just been focussed on the dress shapes and making, handling the satin, getting it to sit on the body right, didn't really consider what it would actually look like!  Oops. And then had to wear it at the end of course exhibition -  thank goodness my shoes hurt - a decent distraction from the dress.


Faye's bustle gown - my favourite piece
The exhibition was Friday and Saturday, 3 outfits didn't look that much to start with - until itemised - shirt, waistcoat, trousers and coat,  bustle cage, petticoat, foundation skirt, aprons, bustle piece and bodice, then glam dress, plus all the toiles! No wonder the fingers hurt and the eyes crossed.

 Thanks to all the friends who came round and managed not to snigger at me trying to be elegant....  Had a few cards taken which is optimistic, but kept on being complimented on the artwork rather than the costumes, oh well.....

And now it is over. Done. Packed up in 20minutes and then collected the stuff first thing this morning.
Learnt a lot, discovered new areas to develop and explore, met people I would be delighted to be able to call friends now, and am pretty sure that working with historical costume is where I should be.


Problems  are a collection of costume pieces that each are bigger than my wardrobe. A house in dire need of extensive, if not aggressive, re ordering, tidying and cleaning ( not one clear carpet!). A hedge in desperate need of a remedial haircut and a front garden to get lost in. And I need to earn a living.

Any one after an 1880s bustle ensemble - one careful owner.......

Sunday, 31 August 2014

Victorian Bustle Skirt


Short week at the costume college - Bank Holiday and then a day spent with Jane sampling hem techniques ( brilliant to have such small things and such focussed things to do). So decided to share Gwen's progress with you instead.


 When last we left Gwen she was standing proud in her bustle cage and petticoat- since then she has acquired a foundation skirt,  apron and a bustle piece. The premise is very simple - remake the petticoat allowing for the fullness of the frills, drape a fancy bit in front and pleat high on the rear,  then scrunch up a long piece to hang down the back.  Decorate at will - opera curtains style. Simple!

The foundation skirt is to be  clean, unfussy, as it says, a foundation to build onto.  I've made this fully lined in a nice smooth and soft twill,  a warmer shade than shown in the photos. The pieces are the same as the petticoat-
pre pleating
post pleating
a flat slightly tapered panel for  the front, a tapered side piece, and the rectangular back with a dipping hem. The back is in 2 pieces to allow for a top opening and centre back fastening., it is pleated onto the waistband to give the shape at the top.  Fairly straight forward to do, but quite precise work.  She actually looked pretty good in it! And for once preferred the front to the back ( but didn't photograph it - just imagine its loveliness)


Met Museum example
Once  done it was onto the decorative bits, first should have been the apron -  this hangs in the front and tucks up underneath the bustle. So I opted to do the bustle instead.

nice idea but too tight

The bustle piece is a separate strip at the back usually caught up on tapes but at this scale I tried a slightly different approach. One of the diagrams in Janet Arnold's Patterns of Fashion 2 (p9) shows a complete piece laid out with gather points, pleating lines and folds marked out ( by Myra, Dressmaking Lessons II, 1888!)- this reminded me of smocking patterns so - 5 rows of lattice later-
any bottom would proud to wear this!
liked the over all effect but too dense and flat from the side so reduced the amount of gathers to let it bouf more and...


Having made this in the fabric it  struggled to hold its own weight so a supportive lining seemed in order closely fitting the skirt shape and holding the sides place. These were sewn right side to right side and turned out through the top edge.

Lining, showing top dart
Inside the bustle showing the pinches and  the lining.
I will admit to enjoying the smocking too much and over shortened the length -so  made a tapered knife pleated tail for it The tail is inside the bustle piece in the photo to the right - it is secured by the seam and will emerge as if by magic when the whole construct is turned out. I hope.


Then the apron -
This I draped on her, first on the bias and then on the straight grain - it sagged first and handled like cardboard second, but at least the pattern was the right way up. The idea is get long curving folds across the front - umm. 


apologies for the sun spots
 This seemed to use a vast amount of fabric- billows of it. Perhaps the fabric should have been washed first (see distractions) but it is beginning to give the shapes I want. The example has a quite short. heavily folded apron, on Gwen this looked like curtain swags, so hers is longer and more relaxed.
On hers the edges are bound with bias strips using the wrong side of the fabric to give a bit of contrast and to emphasise the curve. across the foundation skirt


 On the version for me the aprons are included in the waistband of the foundation skirt - for Gwen I quite fancied having a neutral coloured skirt to use with a variety of outfits. The apron and tail are now one unit - the apron is secured at centre back with half the tail sewn in place - the other half extends around the back and fastens with a hook and eye at the side seam. The skirt is now complete and the bodice remains to be done -  say it quickly and it sounds easy. At least the full scale one has the pattern done and cut!


Distractions -
making one for myself at costume college - still wrestling with the pesky corset - shape is rightish - just that I appear to be losing weight so it wanders. Big oops. More cake?
Green grocers on market have ripe fresh figs - yummmmmmm.
Date and walnut bread.
Might have killed the washing machine. Really BIG oops.
Which vinegar to use for apple chutney?
Why doesn't privet get the message and stop all of this growing? Cutting once or twice a year should be ample.

Sunday, 15 June 2014

1795 Round Gown - the accidental dress.

This is a dress that never was meant to be -it is  an accidental dress; I couldn't think my way through a construction so decided to make a mini version to test ideas.
Sensible decision?
 Seeing as it wasn't meant to be happening most of the making hasn't been recorded.


 Moving on from the chemise a la reine-
my illustration for my chemise a la reine based on a
Gallerie des Modes original.
KCI round gown 1795ish
 it seemed right to stick to the drawstring idea but move it on 10 or 20 years.  The KCI (Kyoto Costume Institute) has a lovely light linen example - printed with carnations-  but as usual in these things a full 360 eluded me, so had to make up the back.

 The gowns have a lot in common - the drawstring reigns supreme and while the round gown skirt  has more fullness at the back  but is gathered all the way round.  The sleeve is still shaped and in two parts,  but I can not see clearly enough to see if the shoulder strap is still a separate piece or not. The  shapes and fitting, however,  are changing; the back is cut and fitted and the waist is migrating  rapidly upward.


The model I chose to make is a real hybrid - or transition piece. The back is panelled and  semi fitted, the separate shoulder strap is now part of the front bodice piece, leaving a diagonal seam on the back  It is still depending in drawstrings for fitting at the front and has a decidedly fuller back skirt. For mine the bodice and skirt are made separately and joined at the waist.


bodice pieces
 The dress began with the bodice - shoulder seams and bodice front first, because I wanted the neck complete to start making the channels for the drawstring. The bodice is lined and the channel is made by the stitching for the neck edge  and a second run of stitching parallel to the edge. The drawstring is threaded between the 2 layers of fabric and tied at the centre front. But where to attach the strings? Some seem to go all of the way round the neck, others just the front neck. Mine are anchored to the seam allowances for the front bodice piece so only that central area is gathered.  And then to lace ruff or not?  No - this is an accidental dress not a full production piece.


rounded sleeves!
cuff and top stitching along front seam.
The side back panels were then sewn in place  and sleeves made up.  These  were fun - I top sewed the seams running up the arm - it really did make them rounded tubes - they very nearly managed to stand up but kept over balancing.  A simple binding was added as a cuff rather than the pleated example on the KCI dress. ( colour - the one on the left is accurate - it is the vile berry cloth I've used for linings! The more attractive rusty red is because of the late evening sun)


With the bodice complete the skirt was sewn up and attached.
About 3/5s of the volume is gathered and stitched down at the back. This looked so heavy that I introduced a couple of small pleats  on the centre back panel - a bit counter intuitive but it did work.  The front section was loosely gathered and sewn on.  The  channel for the waist drawstring was made using the seam allowances - folded upward inside and top stitched. Not ideal  or elegant but it served. I tried adding tape covering the seam and threading the string behind that but the additional bulk prevented it from gathering evenly.

A spot of hemming and it was done.  As a round gown - it functions. As an attempt at an accurate round gown - oops.
 Do not like the waist - the raw edges should be buried between the lining and top fabric- it should look effortless. ( the desire to see the mechanics and bones of  construction came much later!). The back should be more exaggerated - a real diamond with points at each corner- mine belongs to a slightly later period.


Was this wise to make? Ummm. It has tended to reinforce the problem areas and to confuse further.  It has also highlighted the 'maternity' quality of the style. Poor Gwen does look as if there are only a few weeks to go!  I hate the feeling of dissatisfaction with decisions made, even compromises should be happy ones.

 " 'Never mind' said the HMIs. 'Never mind.'"

Problem is - now part way through making a full size version of a round gown for me and am getting that same sinking feeling......
Time to go and attack a bush in the garden - something is bound to need brutal cutting, slashing, sawing, or  at least hitting!
 Oh, Happy Sunday!


Sunday, 8 June 2014

chemise a la reine update.... A few hours later

Just couldn't do it, just couldn't leave it.  Kept it at bay by gardening etc, but then it rained. Trapped indoors with a nearly right costume and all the doings ready to hand......

Version II - muslin frill gone, lace attached. Did take over an hour to do but fortunately it was a good long shower. This time did remember to add a sash - a silk scarf. 


The lace is a straight strip so needed to be gathered slightly over the shoulders and back to give a frill rather than a collar.
I'm afraid it isn't antique - old nylon, but at least it isn't bright white and has a slightly yellowed pattern worked through it.


The scale of the new frill has changed the look of the dress. It may still be quite Edwardian but id less top heavy. The distance from neck to waist looks longer and the front pleating is visible without the monster overhang.  Okay the sash is a bit of over kill but the dress does look happier overall.


Every solution  does involve creating new problems- The shoulders are more exposed now - does the gap at the top of the sleeve look too big? More smocking? Yes, it does but not tonight now the light is fading. With the upper section narrower it should give that bell like shape over the elbow. The ribbons need to be on the lower gather aswell. I am reluctant to do too much to the sleeves - they will never work properly until Gwen gets arms, but still....

Does it look more like the original portrait of Marie Josephine? I think so.


Sunday, 18 May 2014

KCI French Revolution Jacket 1790

7.30 Sunday morning -  am sat having breakfast on the back doorstep. Bees are up and busy, birds have been yelling at each other for hours and all is right in my little space, for a while. The jacket is done, finished, complete. Mistimed the start today, it was an hour earlier than I thought when I got up - 6.20! On a Sunday!  So that extra time has been very useful - found some old cover buttons to dismantle and re-use on the tail pleats and then bullied the seam allowance of the bottom of the armholes into some kind of credible finish. It is now washed and dripping gently into the sink. Coffee does taste better with a clear conscience.


It began with the book - big, heavy, lots of lovely photos, BIG  photos and shiny paper.  It says "Fashion" in very big letters on the front and is a tour of the Kyoto Costume Institute collection. There is a double page dedicated to this jacket. While I didn't exactly like it,  I always stopped here.  The notes from the book and KCI website credit it as a French  jacket, red striped silk brocade, dated 1790, so during the French Revolution. The style is quite simple, masculine even, double breasted with the over large metal buttons and collar.  The ideas of the cleaner lines, of a simpler aesthetic and nature over the artificial, had been emerging since the middle of the century, think of the chemise de la Reine or the practicality of the redingote from England,  a sign of the social and cultural  upheavals.   Fashion choices became very important as the politics got dangerous; this idea of the short jacket and skirt  was seen as an egalitarian costume - ostentation was not wise  during the Terror, and clothing was a very direct way of stating allegiances and outlook. We still use clothing in the same way, groups tend to dress in similar ways, we differentiate instinctively between those who are like us and those who are  different. 
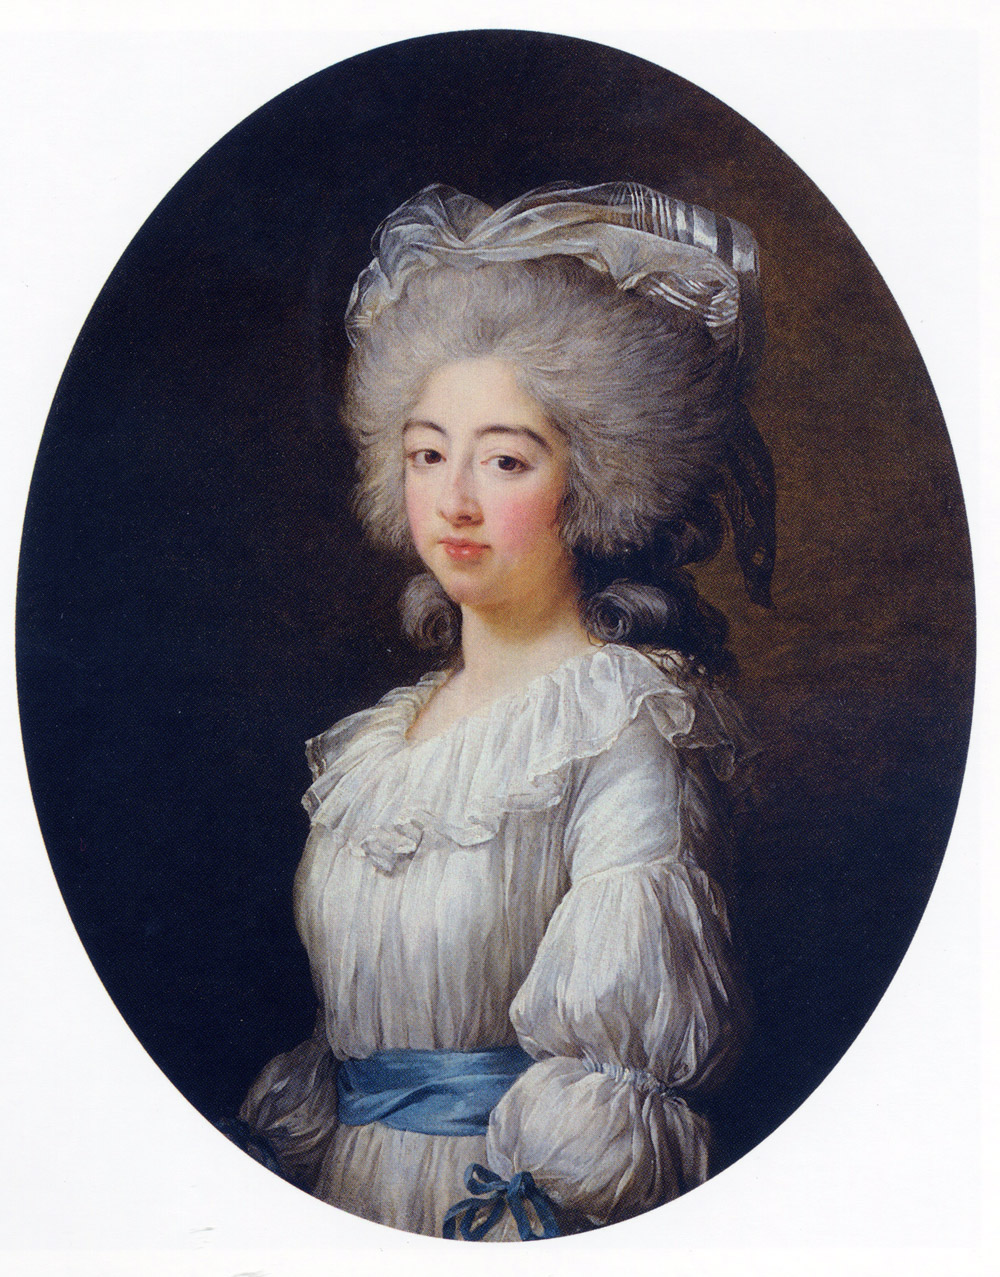
Note the red, white and blue schemes and touches in the fashion plates - wearing the tricolor was considered a good thing and stripes too were  more classless and  patriotic.


  My usual goddess was not smiling – there was no Janet Arnold  dissection of a similar jacket in the Patterns of History. I was on my own. 

The choice of fabric for the original would have been an essential part of the garment, stripes were patriotic, worn by all, and showed support for the Revolution. I had 1/2 metre of delicate girly stripe cotton fabric, in green with roses (more 1950s really) – shall we  claim it symbolises the green revolution? (unfortunately not recycled).  The lining is quite heavy off white cotton, a scrounged off- cut of unknown parentage. So, my  expectations for this jacket, a fairly close copy – but want to be more determined about stitching processes and finishing. MUST not dodge doing the 18thC sleeves. Will do the odd banana shape sleeves.

 The bodice -I  borrowed from the French Revolution escape dress  for back shapes  but  reduced the flirtiness of the peplum to make it more masculine in cut. The fronts are extended wide to allow for the overlap  and shoulders pieces will be added later. 


 All began well – did the 4 layered ladderstitch for the main seams so the whole garment was being constructed in one go.  Tried not to make them quite so tight  but it still gave a stiff finish, felt a little like scar tissue!


Then the sleeves - First the strap which completes the armhole.  The lining was cut and attached first over the shoulder, raw edges folded in, ready to go. The sleeves themselves are in 2 parts, with seams at the front and back. I made these with the  linings separate and  assembled them and the cuff detail before sewing to the bottom curve of the armhole. This part was meant to be finished like a French seam for strength and  with the raw edges encased, but in the expectation of having to undo and reposition  I left them to neaten later. Oops. 
   Then the upper part of the sleeve was tacked in place to the shoulder strap.  I still had the collar to add into the neck edge of the  sandwich. so the  top fabric  was stitched on later. A lot of stitching in a small area but very effective, and it  is neat and robust. ( Photo is of the shoulder turned inside out, spot the raw underarm section!)


The collar - painful. I haven't found any back views of the jacket so I borrowed from this, also at the KCI dated 1780/90.  It is very masculine, like a caped driving coat. The original jacket's collar looked to be a single thickness and rolled down to drape. It flared over the shoulders so I imagined it not sitting flat but continuing to flare at the back like the grey one's capes.
Cutting it was easier than expected I didn't manage a pinked scalloped edge but a feeble cry on facebook resulted in the loan of Janette's pinking rotary cutter - excellent new toy, zoomed round those shapes no problem! Attaching took  longer. I really needed to think ahead, the plan was to slot the collar between lining and top fabric, but the seam stitching had secured them together. Un picking, muttering and repairing, but the collar was on. I guess a canny person would have left the top inch unsewn on the back seams.

After this it was all finishing,- the top shoulder straps, buttonholes, buttons, hemming., but....
Buttonholes - been avoiding them for years.


It began with the Purple Caterpillar of Horror, proper thread, proper stitch, proper mess. I did try welts but the inside was a sight, Then the yellow attempt and finally the unbleached millipede. Practice did improve matters and the end results are not too shaming.

Buttons - Bought these an age ago, liked the quirkiness, but never found just the right place for them. This probably isn't it, but they were the right size and number, tonally they matched and it was 10pm. When next in town I may trawl for a more 'period' choice - but you can be sure that they will have to fit those same buttonholes.
As for the mini cover buttons - used no gadgets so went together easily and made a nice finishing touch to the back.


Being me, of course, there are areas to be improved on, solutions to be pondered and developed further but this is actually something I feel quite proud of at the moment. It does what it sets out to do;  a copy of  the KCI jacket. It was never going to be the bees knees, the back is a best guess compromise and so are the inside details. But it has gone together remarkably well - I must have learnt something over the winter!

Hit List -Sleeves-  practice the sleeve setting technique - it went together fine but the sleeve linings behave like teenagers, excessive enthusiasm followed by strops and that 'so make me' attitude. I will advise myself to be more vigilant and baste lining and outer together more firmly and retrim if necessary before putting in. I must also be more careful about keeping the seam allowances even.
Seam stitching technique - the tightly stitched seam looks lovely from the inside but the looser stitched ones work better from the outside. Need to get the stitch size and tension right and then stick to it. (I may need to find a film with no exciting bits in to watch as I sew.)

Button Stash - needs organising so that hours are not wasted looking for that elusive last match. It might help if buttons are returned to the tin but they are adventurous little things and keep turning up in little colonies in odd drawers and boxes.

 BUT (big but) at last I have made something that is as smart inside as it is outside!


Coffee has gone cold, moment of oneness is past - blackbirds are squabbling - might even have to do some housework. Later....


KCI- jacket page -http://www.kci.or.jp/archives/digital_archives/detail_34_e.html 
FASHION - A History from the 18th to the 20th Century. Vol 1 p102/3      Taschen

interesting reading - http://blog.seattlepi.com/seattlearts/2013/10/15/fashion-the-french-revolution-and-a-masculinity-in-continual-crisis/

http://locutus.ucr.edu/~cathy/mg.html  - Journal de la Mode et du Gout
Caroline Weber - Queen of Fashion, what Marie Antoinette wore to the Revolution